Beexwax polish

Last year I made some beeswax polish. After a while I managed to sell it. People really liked it and asked for more. So this year, from my cappings wax haul, I decided I would make some more.

Beeswax Recipe 1.

Equal parts beeswax and turpentine

Method

  1. Liquefy the wax by heating – do this in a ban marie so it doesn’t overheat and keep away from naked flames.
  2. Pour the turpentine in – this is flammable too, so be careful. also keep the area well ventilated, the fumes are not good for you.
  3. Some of the beeswax with solidify, keep warming until its all liquid.
  4. Pour into tins, allow to cool & solidify, use as you wish

pro’s and cons

  • This is simple to do
  • The product is a hard wax, it requires hard work to apply it, but it gives a very good ‘hard’ finish on wood
  • Turpentine gives good penetration into the wood for a long lasting effect
  • Turpentine is expensive
  • Turpentine is hard to find in the shops, usually replaced by turpentine substitute which wont do the job here.
  • Turpentine is not nice stuff *

* Wikipedia says
“As an organic solvent, its vapour can irritate the skin and eyes, damage the lungs and respiratory system, as well as the central nervous system when inhaled, and cause renal failure when ingested, among other things. Being combustible, it also poses a fire hazard. Due to the fact that turpentine can cause spasms of the airways particularly in people with asthma and whooping cough, it can contribute to a worsening of breathing issues in persons with these diseases if inhaled.”

Beeswax Recipe 2.

As above but also add a 3rd equal part of raw linseed oil, added after the turpentine.

Pro’s and cons

  • Makes for a softer compound and is easier to work.
  • Apparently works very well treating leather to make it waterproof.
  • Cheaper overall as less expensive than turpentine.
  • Still contains pretty nasty turpentine

Last year I made some of recipe 1 and some of recipe 2. Recipe 2 sold better, being easier to work and I think looking more brown. This year I’ve made more of that recipe, and used up all the turpentine that I bought.

Now I have found an option which doesn’t use turpentine. The question is, will it work as well?

Beeswax Recipe 3.

  • 1 part beeswax
  • 3-4 parts olive oil (some say this is replaceable with coconut oil, jojoba oil, walnut oil, etc.)
  • optional : Essential oils for scent (lavender, vanilla, sandalwood, etc)

Method

  1. put all together,
  2. warm

Pros and cons

  • Less flammable issues
  • Easier access to ingredients
  • Much cheaper ingredients
  • More natural product
  • Less harmful chemical concerns in preparation and in final product usage (e.g. kids toys)
  • Some concerns over oils going rancid, can be extended by fridge storage and/or Anti-oxidant such as clear Grapefruit Seed
  • Extract or Vitamin E oil can be added. However these antioxidant essential oils are very expensive

Queries

  • Will this recipe penetrate as well, so will the finish last as long as the turpentine recipes.
  • Concerns over the product going rancid – a) shelf life an issue & b) after application is there still risk of it going rancid in situ?
Wax on wax off

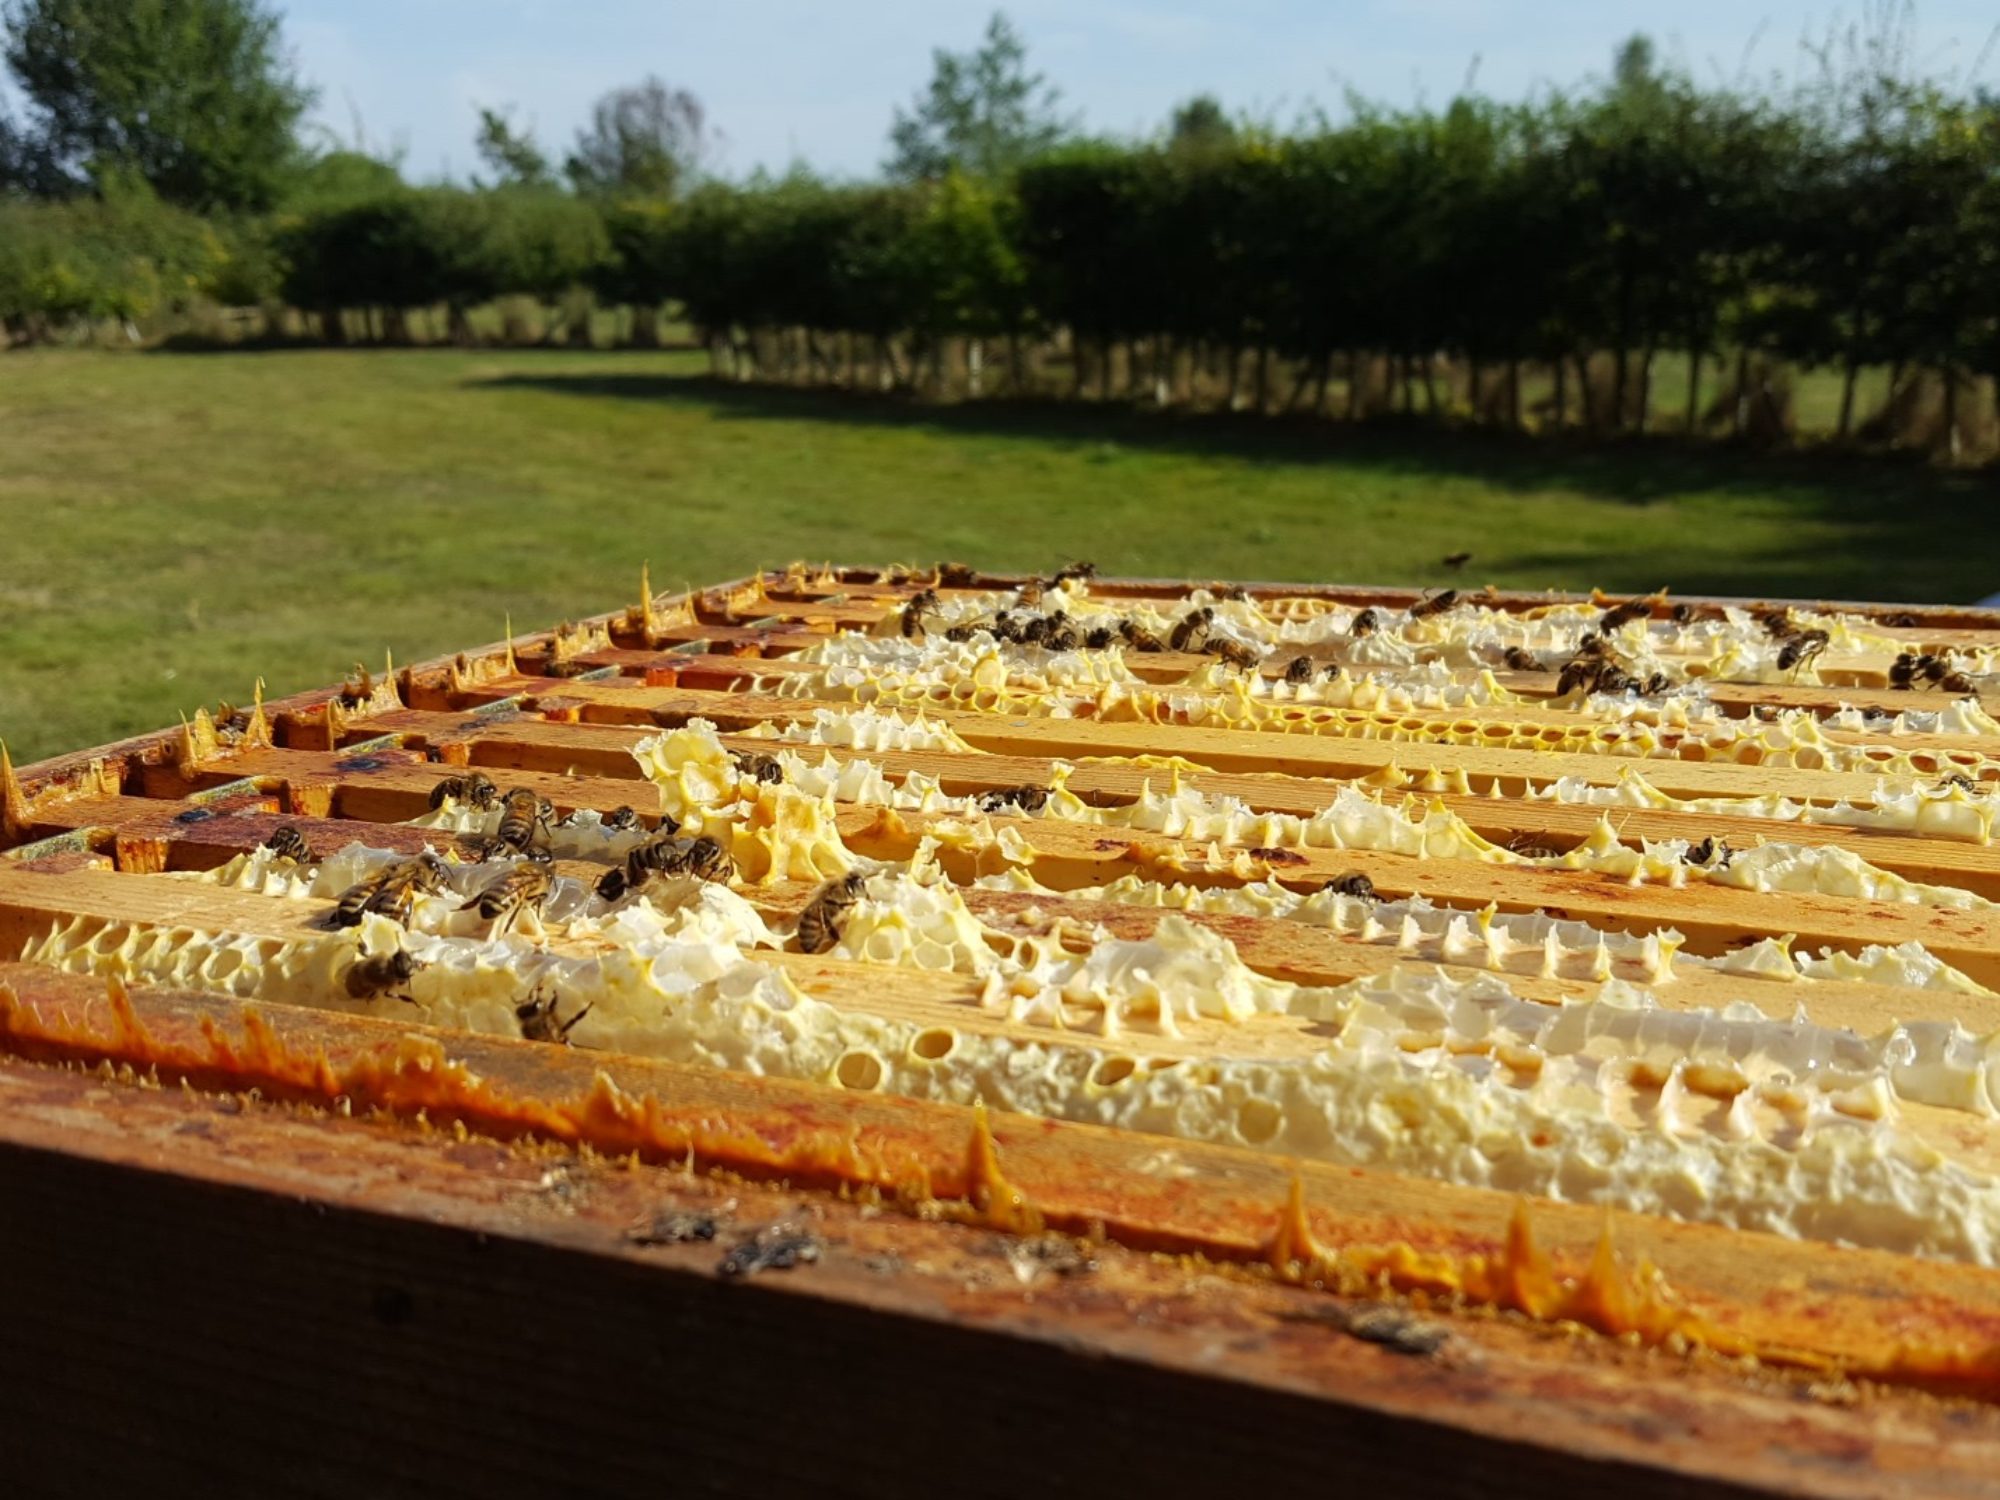
So many supers, so many frames; Finally its all spun out. Buckets and buckets of cappings, most of them relatively dry due to using an uncapping fork lifting the cappings off the honey cells above the air gap.

As before I wanted to clean the wax to use in lip balm, beeswax polish, etc. I found out the hard way that just heating it is unwise, you end up with a brown mess, you need to wash the honey out of it first. This has a nice side effect, basically, making mead. So to do so I put buckets at a time of cappings into a straining bag and washed them. Then straining them I used the washing water, now full of honey, to make mead. Just to understand the scale of this, I made 13 Gallons (uk) of mead.

Then it was time to melt down the wax. Now when it started it looked a lot like white sandy flakes, I added some rainwater (our local water is hard and that turns wax greenish). On heating all this brown gunk was produced along with the nice clean wax, even though there wasn’t a lot of brown going in, so I don’t know what that was. Anyway after decanting in bowls I waited for it to cool then scrapped the brown stuff off the bottom and heated it again. After a couple of rounds the wax is ‘mostly’ clean and the volume has gone down a lot; when I melt it again to make things I will decant it off the last of the gunk. End score 2.68kg 🙂

A tower of wax blocks shaped by bowls, sitting on a scale showing 2.68kg
Tower of wax

Busy Busy Busy

Its that time of the year when its harvesting and hard work, and the interest in bees becomes a bit of a burden. Trying to keep up with moving hives and rotating supers to spin the honey off to give the bees enough room so they wont do an unwise late swarm.

Harvest so far this year, as extracted, is just short of 300lbs, but that’s not the end of the story. I have 13 supers taken off and not extracted yet so another 325lb hopefully and about another 9 supers that need to be taken off yet, so another 225lb hopfully. So I might get to 800lb all told. Last year was about 340lb in total so its going in the right direction.

Some hives have done stunningly well, one of which was a nuc this year and has brought in almost as much as the very best which I think is going to round up to about 150lb.

This year, I’ve found that :

  • 4oz jars sell well for people that just want to try something (so more of those to order)
  • jars are hard to find when you’re running out, buy lots when you find them cheap
  • a good stand is not hard to make, but if you leave them on a field alone people will steal them (Grrr…)
  • you never have enough supers ready
  • raising your own queens is a very good idea, apart from ability to improve your stock, it means that you will have spare mated queens if you have an unfortunate / sudden queen loss
  • if you have a mean hive, re-queen and don’t let the drones mate with any queens you want to use.
  • I need to keep better records – once again I didn’t manage to keep up full records throughout.

As I have a couple of queens left over from queen rearing I am going to split a couple of hives at the end of the year and overwinter as nucs.

Strateolaelaps

So at the start of the year I planned an experiment. Trialing mites that are supposed to kill varroa mites, strateolaelaps scimitus ( try saying that after a drink or two ). Anyway the plan was establish a varroa drop rate, then use the above mites then see how that changes things vs a control group of no treatment and another group using api life var treatment.
Well the best laid plans got scrapped when in all my hives I got no mite drop. Does that mean I have no mites, well no, because later in a hive I spotted deformed wing virus and went hunting and found mites on the comb; and still there was no drop. So they are clinging on ehh !! Well we will have to do something about that.

Unfortunately my hives are in ‘flux’, ie artifical swarm, swarm, mysteriously queenless, etc. So there is no controlled or fair experiment I can carry out given such variety and a small sample size in the first place.

I need to do something really about the varroa (or maybe not, but I’m going to anyway), so I bought my tube of varroa munching mites and I am going to put them in about 4 hives asap.

I won’t get anything but a gut feeling as to if it has worked, but I will at least have tried, and normally I only treat in autumn so the bees are getting more than they would otherwise.

Wish them luck.

Another beehive stand

Some of you may remember in my post of ‘how to make a double beehive stand‘ that I mentioned a friend who made one around the same time. The friend, Dave Eacott, said he would be ok with me showing where he got to with his DIY creativity.

“Please find attached pictures of my new hive stand.
It is not as robust as yours I was looking for something lighter that could be easily carried in the car. I did not shop around for best prices everything came from Wickes.
I have a few items left over that I could use on my next stand.
It cost around £25.00”

Queen-tastic

Hooray ! The queen from my early queen rearing exploits has been mated and is laying. My first (purposeful) queen-reared queen. My first green queen of the year, marked and clipped. She has a big golden abdomen,  far larger than last week when she was still a virgin.

Quick sideline – queens are marked in relation to their year. I mark mine the year they were born, others mark them for their first full year, i.e. the year after they are born. As long as you are consistent in which you chose its not a problem.

Year ending :

1 or 6 – White
2 or 7 – Yellow
3 or 8 – Red
4 or 9 – Green
5 or 0 – Blue

As it is 2014, my queen is marked green.

You can remember the order by the memnomic “When You Read Good Books”.

Actually talking about marking if you buy a ‘queen marking pen’ from a bee equipment vendor, you will pay between £4.50 and £6 for one pen. If you search for exactly the same pen by its brand name (on ebay, Amazon, Google etc) then you can get one for £2.10 to £2.50. Better still you get more choice of what colour, for example I have a lovely light green which shows up in the hive far better than the standard dark green and similarly with the blue. So search for “Posca 5” and save, getting about 50% off. No, I am not on commission,  I am just annoyed at people bumping up the prices on beekeepers for things.

Anyway,  I have a new queen and a super calm hive so I’m happy. More good news is the colony she came from had to be artificial swarmed today so I am going to have a few more of these lovely ladies by harvesting the emergency cells and bringing them on in mini mating hives.

Making a double Bee hive stand

To help with making my hives being more transportable I decided to make a hive stand. One of the issues before in moving hives was not so much the hives, but rather the awkward size of the hive stands. I’d seen another that a friend had made and took my lead from that. Recognising the weight of honey that two hives can carry I decided to make it sturdy.

Shopping list :

Total = 37.60

Well, good enough I guess but the 2nd will be £9 because all that is used up is the wood.

I don’t tend to take measurements in the classic way of using a ruler or tape measure. I make things to fit their purpose by measuring against what they are going to be used with. One of my aspirations with this stand is to make it so I can hang a frame between the side bars when I take it out. This is so I can take frames of bees out and not have to rest them on the floor (I’m not keen on hive frame rests). So the first measurement was against the brood frames, wide enough to fit a frame not so wide as to drop the lugs at the edges

The picture does not do it justice, but the lugs are about 1cm longer than the cross bar shown here.

The next thing to do was to attach the side bars to the cross bars, I wanted it to be sturdy so I chose some hefty coach screws. I used 8mm metalwork all round, given the toughness of the unit as a whole maybe I should have used 10mm, but I am fairly sure it should be sufficient to the task.

As can be seen below I might have overdone the depth of the screw, I didn’t want to do things by half. Who is going to be the first to point out that its not weight bearing… ahh well wait a bit.


With the basic structure set it was time for the legs. Oh and note in this picture the use of a stool, a dremel case, a hive leg and an entrance block to hold up the other end. Don’t underestimate the usefulness of someone to hold the other end when dealing with such large heavy timbers. I definitely needed help when trying to cut the end of an 8ft 2×4.  As to the length of the stand, the length was defines as comfortably being able to hold a hive at either end with a nuc in the middle; might just be able to get three hives on at a squeeze. 


The next step was the ‘feet’. Given the legs point outwards I wanted them to be flat on the floor, requiring an angle cut. This is where  I did used two classic measurement tools. A tape measure to ensure the legs would all attach at the same relative point on the long bars and then a set square to make use of the right angles between the cross bar and the floor, to make sure the angle cut would be right.Before I get complaints, yes I know I have taken the blade protector off my table saw – don’t try this at home kids, its very dangerous.

Attaching the legs with the threaded bar was next. I tell you after this you wont ever want to look as a nut again, not to mention a washer that keeps down falling down. Anyway, 2 washers between the side bar and legs to allow movement and a washer inside each nut to it would not cut into the wood (like it did on the coach screws, oops).  


In this next picture you can see a couple of things. Firstly the legs fold in nicely for transport without meeting in the middle, an aspect that meant that I could not make the hive stand as tall as I would have liked, but it saved on wood. Secondly, something to remember next time, the screw bars are still a metre long, not that I forgot, as one you cut them you can’t get a nut on that end as the screw gets messed up. The issue here is that I wanted to cut it nice and close so it would not catch on things in transport, because it was in place I could not get the jigsaw in close enough that I had just found a metal cutting blade for, so I had to do both with a junior hacksaw. That took some time – lesson, plan ahead.

And here is the finished article (short of running round it with the sander to get rid of corners).

Now it is finished, what would I do different?

  • Well it is heavy, so I would like it made of cedar to lower the weight.
  • I’m not sure of the need for the threaded bar, maybe just long bolts would do. It would cut down on the time I spent spinning nuts down the threaded rod.
  • Next time I will cut the bars with the jigsaw before putting them in.
  • I would have preferred bigger penny washers between the legs and the side bars
  •  I will sand the wood before assembly next time.
  • A friend of mine made a lighter and smaller one – I will see how he does with his this year and maybe make mine smaller next time.

I’ve not tried to fit mine in the car yet…

Good news, bad news

A hatch, a hatch !!

So the dark patch / hole between the two bees with their bums in the air is a hatch, where a queen has cut her way out and emerged from her cell. This means she is out and roaming the hive, still a virgin until she is mature enough to go on mating flights (about 4 days from hatch – Saturday), and we have the weather and the drones (cross fingers).

I wasn’t so lucky with the two mating hives, they both failed. On opening them the queens were not being cared for and only about 20% of the bees that I had put in were left in the hive. Lessons – follow instructions about stocking mini-nucs, or at least move them to another apiary so the flying bees don’t just go to the hive they started in. I also suspect that putting the queen cells in the metal cages might have dissuaded the bees from looking after them due to being cold metal – next time have comb to press the cell into.

Still, I have a hatch from my own first grafting, one way or the other its a win. Even if the queen does not make it to mated, I’ve kept the colony from turning to laying workers (or just being bored).

I’m going to leave them to a week on Saturday (12th April) so she has had time to become mature and hopefully had a weather window to get out and mated; maybe by then I will get to see eggs, fingers crossed.


Change of plan & mating nucs

Bit of a change of plan. Following a chat with a fellow beekeeper, and the suggestion that combing over should not be an issue at all and was quite normal, I decided that I should try to raise all three queens separately. This was also helped along by the fact that I have a mean colony in one hive and a suspected failing queen in another.

Now previously I mentioned that I had prepared some mating nucs, so this seemed the solution here.  Looking at the frame the comb had increased overnight and now the cell I though was good because it was clear of extra comb was now linked to the neighbouring cell and starting to get its own covering. I cut between the paired cells with a stanley knife and then pried the combed over cells from the bar, leaving the partially covered cell on the bar and putting it back in the original hive.

Actually I left a step out there, I prep’ed and filled the mating hives with bees, using a correx nuc box to shake a commercial frame into each box. I put each cell into a wire cell protector, because I didn’t have comb on the bars in the mating hive and needed something to hold the cell. The entrance dial on each of the nucs was then turned to ‘vent’ to keep the bees in – don’t worry they had lots of fondant to feed on in the rear compartment. The bees will be let out tomorrow once they have acclimatised to their new home and queen cell.

Given the timetable of events the queens should hatch on Monday or Tuesday; I’ll pop back on Wednesday to see what has hatched.


Three, three, the rivals

So three cells have been made; three out of 30, but I only need one queen.

Well I say three, but two of them are heavily combed over, so maybe that means they are dead in the cells.

As I only need one I am going to leave them in the queenless hive and if they are all viable then they can fight it out to see who is going to rule the roost.