Last weekend was take up with processing honey in 2 ways – one “normal” extraction and the other Cut comb processing. I thought i would talk about them both a little
“Normal” Extraction

So for, I think, the majority of ‘modern’ beekeepers
Quality honey and some stories behind it
Last weekend was take up with processing honey in 2 ways – one “normal” extraction and the other Cut comb processing. I thought i would talk about them both a little
So for, I think, the majority of ‘modern’ beekeepers
The bees, ahh the bees. Well, they are all back from the borage and all survived (since I lost one to wasps); I thought they hadn’t but they were just light on transport.
I’d oddly lost one on treatment, the entrance was closed down and I think basically they got trapped inside, and with large numbers they starved quickly.
I’ve fed them all, some had already put in ivy honey which was starting to cloud up in the hive – uh oh. Some took down inverted syrup really well – others have hardly touched it and are a bit light so I guess I will be topping up with fondant over winter.
I went and put on all the mouse guards the other day. One mating hive has survived the wasp onslaught and so to get it through the winter I have put it inside a national brood box and put a hessian sack around it to keep off the worst of the weather.
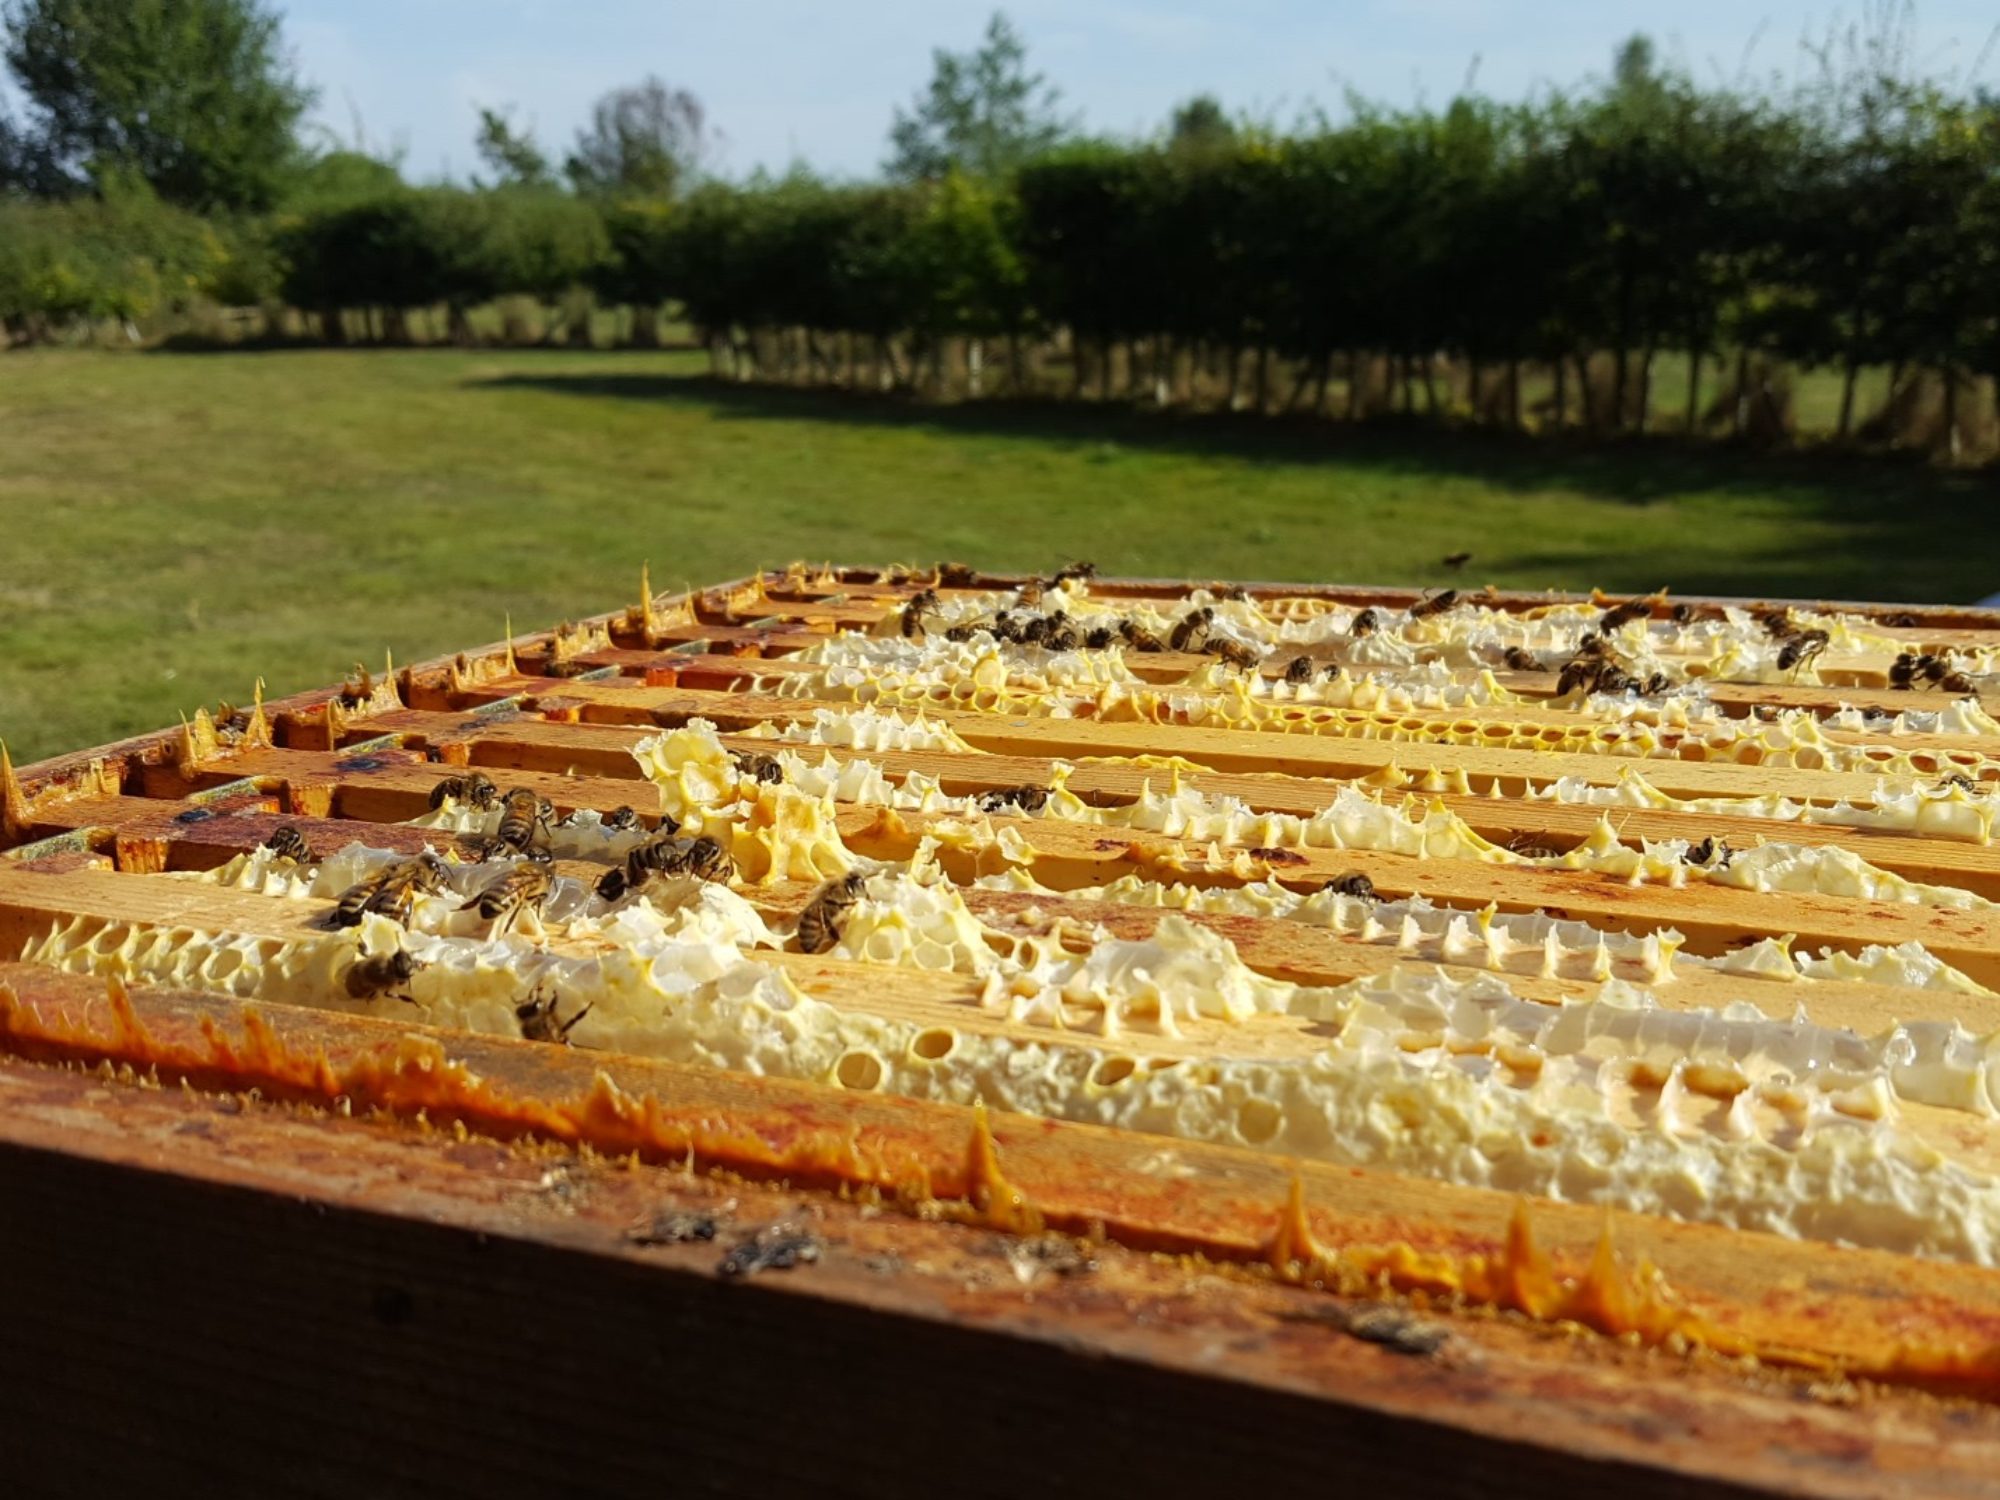
I am very fortunate to have a lovely location for my apiaries, this is Matching Tye. The hives from here sit in a private garden which comprises of 13 acres of wildflower meadow, vegetable garden, orchard and flower garden; set in a area surrounded by farmers fields with oilseed rape, beans and other varieties of local flora.


The bees here have a lovely choice of year round forage sources in short, which makes for a reliable harvest (if I can just keep them from swarming).
Here in our pictures we an see the meadow they have as an overview. This is a south facing aspect although with trees to the left out of picture they don’t get the sun until 10am – which can make them grumpy to inspect early as the hives have not warmed up. It can be a hot pocket in the afternoons though as they have high trees behind which works to baffle the wind from taking the heat off. Essex is a warm and dry county in the Uk, which makes for a fairly reliable crop.
Anyway back to the theme… harvesting. Harvesting from this location is usually early May (in a good westher year), early June, July and maybe a August. The early May usually has oilseed rape (canola) in it and is a bit prone to set. As such it can be a timed harvesting to align with the rape fields turning green, and a speedy extraction – before it goes hard in the frames resulting in not processing it all or hours of scraping honey out of frames. The issues with leaving it to the bees is it will mean any honey they put in with it will also end up setting in the frames.
Beyond that stage, its spinning out the honey and draining into a bucket. I separate the honey by locations and on occasion by hive – as the bees are faithful to sources they find it can mean a really interesting / different honey in one hive while other neighbours are more consistent. I also separate by month/harvest – as month by month the bees find different flowers I bloom and the honey varies as a result. I have to say my favourite is when having a dry hot spring the flowers run low on nectar and the bees go for the chestnut – this gives a lovely rich brown honey with a lovely aroma and taste with caramel overtones.
I have found beekeeping dummy boards to be quite expensive, especially if you use 14×12 boxes like me (approx £7). As a result I have often done without, which has on occasion given me grief of brace comb to the wall, or in other cases a whole new piece of comb handing from the roof.
This year I’ve decided I’ve had enough and that I would make some.

I had spare top bars, so I used those – but you could easily use top bars from old frames, just clean and scorch them (or soak in 1:10 bleach or boil in washing soda) to make sure they are disease free.
Drill 3 small holes in each, smaller than the screws you are about to be using
Add a line of glue

Cut some sheets of plywood to fit – I lined it up with a brood frame to check the height and the box for the width. Don’t forget the top bar adds a little height (like I did before cutting)
I used 12mm which is a bit overkill, but was what I had to hand – 9mm is probably best, with rigidity and ability to drill into from above. 3mm will glue on / nail on, but in previous experiments has been very flimsy / prone to damage and warping in practice. more than 12mm will protrude and may not sit flat with the weight. I used marine ply, which will probably last better in the humidity of a beehive .
I cut it with a mini circular saw, which left me with a bit of a messy edge, a rasp soon sorted this out.

Attach the top bar to the ply wood, using the glue and holding it tightly in place while screwing in. When not pre-drilling the holes in the top bar it easily splits (from experience)
Quick recipe – 1 gallon of mead
While brewing this I ALWAYS use sterilised equipment, we are growing a yeast in ‘ideal conditions’ which means anything that gets in there will grow nicely too. Pay attention to anything that touches the mix, spoons, siphons, funnels, etc. A quick rinse under the tap or dropping equipment on the floor then using it it not ok – the “5 second rule” does NOT apply here – dipping a finger in to “try a bit” can have consequences.
You will need :
My method would be
Winter and summer bees differ significantly in how long they live; 4-10 weeks (usually 6) for summer bees and up to 7 months for winter bees *.
What I didn’t know is that this is predestined from their time as a pupa (I had thought they just changed as an adult based on conditions). Apparently the temperature of the brood nest defines their physiology. Bees raised at 36°C will be summer bees, but raising them at 34.5°C will result in winter bees.
Cite : BBKA No223, pg381. HOBOS.
* winter bees are also noted for growing ‘fat bodies’ which allow them to store energy for longer periods which helps them get through the cold of winter.
It was May 1st; I never seem to get round to writing these things up when they happen. The weather had been very unusual, we’d had a warm winter, right through to early Feb and then cold and miserable right through to mid-April. As a consequence the bees had not balled over winter and I’d left feed on. I’d sublimated oxalic to deal with varroa, but due to the warm weather I would not expect them to be broodless which is required for that to work optimally. A week or so before I’d been and looked through the bees, done some of a spring clean, but the weather didn’t hold for a full job.
The first hive I went into, I found the queen right away, she was walking around on top of the frames as I lifted the crown board; and she was alone. This had been a good hive last year and had gone into winter full of stores and as I said still had feed on top. Further to this I’d also put on a pollen patty a few weeks back and when I did the ‘spring clean’ I’d noted they only had a couple of frames of brood so I had topped in up from a neighbour with an extra frame of capped brood to boost the numbers into spring. On further inspection, they had basically ignored the doughnut feeder full of syrup, they had gone through much of the pollen patty and then starved due to hard stores of ivy honey. This had happened last year; with a mild winter they had eaten all the syrup given to get them through the winter and replaced it with ivy honey. The plan was to leave syrup on top so they could use that. Unfortunately it seemed they did not get the memo. In short the hive was beyond rescue, even though the queen was still alive.
The second hive was a bit short of frames of brood for the time of year, but then most were, and this one had supported hive one earlier, so 4 frames of brood was as expected.
The third hive had been my favourite hive, productive, very calm and not swarmy. Unfortunately the wasps had robbed it to death late in the season and it has stood empty since, stone on top signifying it was empty.
Forth hive, basically had lost its queen, when I looked in before there was a sealed queen cell, but this time no sign of it and only drones being laid.
Fifth hive – packed !! The few weeks previous I had noted they were on 7 frames and so I’d put a super on. They had since put a bit of honey in the super, but it was by no means full. The brood was almost wall to wall though in the brood box, 10 frames. Looking through they had made a load of swarm cells – and I mean a LOAD, going through the hive about 16. Time to do something about it first job “Find the queen. All the way through, more swarm cells, no queen. Through again, no queen, cut down on queen cells, but not all of them. No queen in sight I thought I would follow a couple of manipulations. First frame with eggs and early larvae to hive four as a test frame, three more frames complete with a nice queen cell to the empty hive three to split, to reduce the colony pressure on five nd have a new hive three, feeder on top to support that. I then went back through, but still no queen to be seen. Another super on top then time to go.
Just as I was leaving, stepping through the gap in the hedge I noted a nice swarm about a foot off the floor – so that is where the queen went !. Well I didnt have my swarm catching box or anything, so, solution, back to hive one, knock any remaining bees out, carry hive to the swarm, place under the swarm, quick shake of the branch, flump, bees in the box; hive back to the stand, feeder on, roof on, job done !
All in all not a bad day, starting with 2 working hives, ending up with 4, maybe 5, if the test frame takes.
http://www.gizmag.com/bee-obstacle-avoidance-drones/42675/
Dense forests crowded with branches and leaves provide quite the obstacle course for fast-moving insects. How they are able to identify gaps to move through seems to defy their small brains and low resolution eyesight. Researchers at Sweden’s Lund University have now uncovered the tricks the animals use to navigate these tight spaces without running into trouble.
http://www.naturalnews.com/053562_bee_colonies_population_decline_herbicides.html#
“Our results suggest that current levels of pesticide exposure could be significantly affecting how bees are interacting with wild plants, and impairing the crucial pollination services they provide that support healthy ecosystem function,” he said.
In other words, if herbicides hinder bumblebees’ ability to learn and adapt, then wild bees could become increasingly sensitive to changes in the environment. According to a separate review, an estimated 57 different herbicides are poisoning European honey bees, which is contributing to the rapidly declining bee population worldwide.