Highs and lows

Well its been a mixed inspection this time round. Two WBC’s coming along nicely at Hastingwood but in need of some replacement frames. The Queens seem happy enough but the new one needs marking and clipping. On that note I just picked up some little snippers called “deadheads” the other day at Wilkinson’s that will be perfect for the job.
Anyway, the next few hives at matching tye were struggling a bit. One had very few bees and a queen, the other had 4 frames of bees but then emergency queen cells and no eggs. So now I have one fewer colony after a newspaper method merge. Well one was struggling and would have not built up quickly enough to catch the rape crop; and the other would have ended up with a virgin queen with no drones about to mate with.

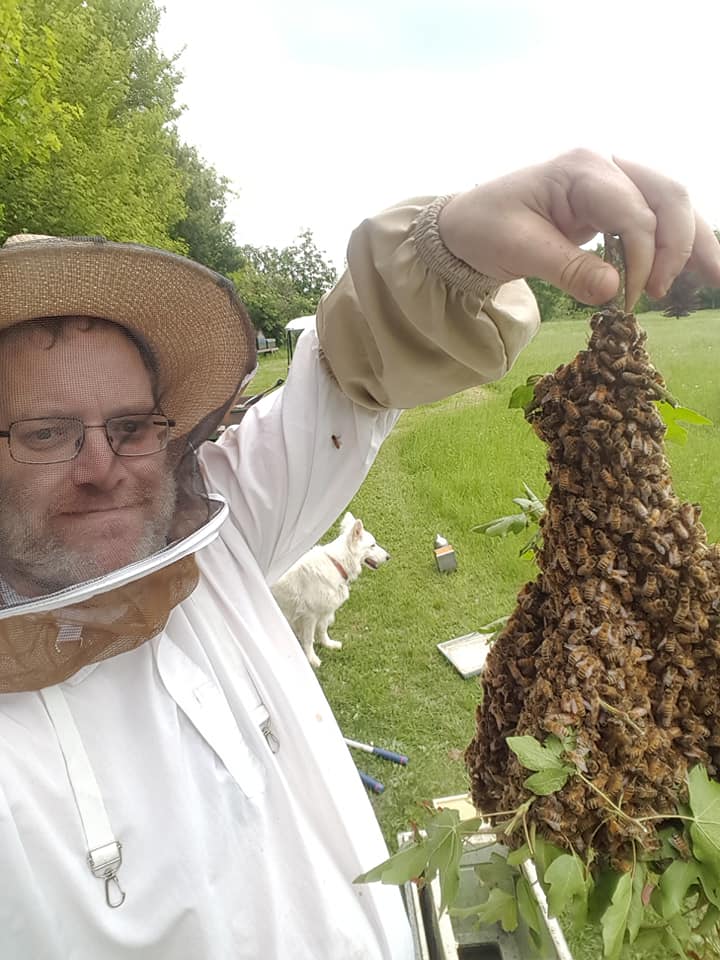
The last hive on site held a surprise or two though. Apart from being the only hive that seems to be touching the pollen patties, it is also building up wonderfully. Four 14×12 frames of brood, right across the frames; the hive full of bees (and at lunchtime too, so the foragers would have been out) and lovely fresh honey coming in. Won’t be long til they will be needing a super. One little sting to the wrist, but with a result like that who could hold it against them.

On to the last site and, if you can believe it, better news. Seven frames of brood! So, you know what seven is the magic number for, yup, time for the first super of the year, Hooray! One sting from this hive, but what is that amoung such good news.

This year I have some supers that have drawn comb and some with just foundation. I am told that alternating comb-foundation-comb will improve the rate that the foundation is pulled out and so that is what I have done.

The other hive on site was doing well, up to 4 frames, but not quite ready for a super yet.

Both those hives are on standard national frames and I plan to comb change them on to commercial frames. More so that the colonies have made a mess of the combs and the woodwork is old. I may go back to having a couple of standard nationals there another year with some new/repaired woodwork.
April Inspection

I inspected mine yesterday. Touch wood, they have all made it through, but they look very lacking in bees.

How many frames of brood do you have on yours?

My best are on old nationals in my parents back garden which is very sheltered so I guess that has helped a bit. Those two have 4 and 5 frames of brood; others however on commercials are FAR less well off, only having 1 frame on each hive. They are in a more exposed position, which made it ‘fun’ to inspect on Sunday without the bees getting blown off the frames. Interestingly the deep nationals I have have faired better in the same location with the commercials, but they are in WBC shells so maybe the extra bit of insulation helped. I have one where I saw the queen but I think no brood at all, but then I was in a rush to put it back before the clipped queen blew off and I lost her.

I had a fair bit of white hard honey too, I figured it was the rape I gave back to them and got them to take down in autumn, but I guess it would have been Ivy.

The fun, interesting part of the weekend was that both the national colonies were bringing in some very blue pollen, I should have taken a picture really. It looked like this :

Blue pollen

and from a bit of research I think it is from :

http://en.wikipedia.org/wiki/Siberian_squill

given the colour and the time of year.

Visit four: First full inspection of the year.

Ah ha! No bee stings today! Well except I kind of cheated, I didn’t inspect the hive that has done for me before. I was a bit tired after the first seven.

My inspection was last Tuesday, the temperature at the apiary was recorded as actually reaching 16C. Since then the temperature has crashed, raining and today snowing with temperatures of -0.5C. Hence I have not had chance to go back to the hive that stings, ‘Waldorf’

First inspection and what did I find? Every hive has made it through the winter, Hooray!

Every hive is starting to build up brood, with anything from half a frame to three frames of brood, in all three states of progress (eggs, larvae and capped brood). I should be happy, but my favourite, ‘Danish lady’, is the least progressed of all at only half a frame of brood. I was a bit suspicious that I might even have seen a cell with a dead larvae in it. I shall watch that one carefully to see how they progress. With the up and down weather we have been having anything could have caused it, so I am crossing my fingers. I just wish she had put on bigger numbers by now, I want to use her for a queen rearing course I am undertaking in summer.

I was going to be putting on some pollen patties that I made last year, and have been in the freezer since. I want to build up the numbers to take advantage of the rape seed (canola) fields that will be around in a month. I was lucky I chose to inspect first, as the delays have caused me not to feed them up right before the cluster they must be im now due to the weather. I hope they are managing to keep that brood warm, especially in the two national hives with two and three frames of brood respectively.

As for feeding the hives, well, all but one hive had significant amounts of stores; and I mean like six frames worth. So they were in no ‘apparent’ danger of starvation. Why did they scoff so much fondant? Well, I guess it was more accessible for them, some of them even stored it in frames.

In conclusion, all is well, with one to watch carefully, just in case. I will keep my fingers crossed.

In other news, in just under two weeks, I am taking another bee exam. This time BBKA’s module 1 “Honeybee management”.

Wish me luck.

Visit three, sting three, but with good reason…

So on Saturday (9th) I visited the hives to check on their progress with the fondant. Most of them are making a significant dent in it. Good news though I’ve not lost one colony (touch wood); even the ones that worried me because I couldn’t see the fondant going down, I lifted the edge ad they were there happily munching the bottom.
One frame damaged, still honey at the top
Still lots of bees

Nest of leaves, removed and on the garden

So as I said, visit three, sting three, but not without reason. I went into the hive and cleared out the mouse nest. Being close to 0°C (32°F) it wasn’t the nicest thing for the bees I’m sure, but the nest needed to be cleared. I’d worn gloves, but I couldn’t seem to find my new jacket, so I was in the old jacket which is a bit short and I didn’t have boots on, so they stung we through the socks I had pulled up over my trousers. Then when it was all done they followed me all the way back to the car (100yrds). Well, I say followed me, more like sat on me because it was cold and didn’t move. Anyway, lesson learnt, use a mouse excluder of some type of the other on every hive. I hadn’t done so on this one as it was a hive that I bought and reconditioned. Not having had a WBC previously I didn’t know about the required ‘slide’ to put in place, and the hive is so good looking I didn’t want to nail a bit of mesh on the front and ruin the appearance. Anyway, this visit I took a bit of wood with me, and scored the dimensions of the required slider on to it; give the hive is in use I can’t really take it home and work on it so guesswork will have to do, cross fingers.

Super queen mating hive

I’ve been working on raising queens, so far only hatched, unplanned, queen cells. I’ve got a Apidea hive, and a mating hive that I created myself using frames similar to Apidea frames. Well Apideas are not cheap, and not big enough to be left alone for long without support feeding. My first attempt at making my own was pretty successful, but it had one of the issues that the Apidea had also, trying to load it with worker bees was not easy. Also it was multi chamber, with easy mini-colony only being big enough to hold over for a few weeks. Will I continue to use them? Well, yes, apart from anything else the project I’m about to outline is not proven.

What is a Super queen mating hive?

Put simply, the idea is to use a national super as a mating hive. The simplicity of taking a standard piece of hiveware, with standard frames with foundation; where the bees can be transferred easily by frame swapping from an active colony’s super.

Now using a whole super for one mating hive is a bit excessive, as as with my first DIY job, I split it into multiple parts. Given I wanted it to have it be a bit more self sustaining than the Apidea size model, I figured two frames would be too few, so three or more was the plan. A super fits 12 frames, but I needed a bit of space for walls between each compartment and for manipulation. Nine frames left a lot of space for brace comb, so I decided on having a 4, 3, 4 setup; having the extra advantage of trialling the different number of frames. The sections needed to be kept separate so the dividers needed to come up above the frames and to be affixed to the bottom.


The sections needed to be open-able independently to prevent the individual colonies fighting with each other on inspection. They also have a hole in the crown board for when I get round to making a feeder to support them.


Then finally, I decided they should exit the hive separately, two to the front, with their own ‘alighting board’ to land on ahead of entering through a small defend-able entrance.

What’s next?

Well I’m going to

  • cut a hole in the far side for the centre chamber
  • paint the entrances different colours to help prevent drifting. 
  • cut out the floor of each chamber and put mesh under them so they will have a varroa floor, and ventilation. 
  • make a roof for it 
  • make a stand for it 
  • add foundation to the frames that don’t have it.

Visit two, sting two

A visit to check on the hives ahead of some very cold weather, just to check they were able to get to the food, and to swap liquid to fondant on two hives. My stingy friend decided to have ago at me again, but I think I might have found out why they are so upset. On taking the crown board off, I found that a mouse had found its way inside, munched away a comb and a half and brought in leaves and assorted bits and bobs to make a nest. Unfortunately their annoyed nature, the sting and the cold, persuaded me to put the lid back to return another day. It was my fault for not making a mouse guard for it.

In other news, of the five hives, two were a bit light, one had bees down below, and the other two boiled with bees as soon as I moves the fondant. The other apiary has the boiling with bees effect too as I swapped them from liquid to fondant.

First sting of the year

Today I visited my hives for the first time this year. People at the local bee club had been talking about hives being on the light side, due to a mild winter, and I had just taken delivery of some fondant, so it was time for a visit. The other useful idea I had worked out was, rather than using a plastic bag to ‘apply’ the fondant to the bees, to use a plastic Chinese takeaway container. The benefits being that it would be easy to handle, easy to apply the same amount to each hive (and of course be reusable on top of the fact it was already being reused).

image

Anyway, I took the fondant to the first apiary. This hive still had an upturned bucket of thick syrup on top of it that was half full but I had been reliably informed that they would not take this in winter. I removed the bucket only to find that this was not as true as I had been led to believe, and the cloud of annoyed insects is what earned me my prize. Luckily I had my lovely new bee jacket on (more on that in another post, it arrived under the Christmas tree), but I don’t wear gloves, and this time I didn’t smoke as I hadn’t expected so much interest. Anyway I figured as they liked the syrup so much to top it up from the stores there, and put it back on. On this crown board, which I bought as part of a second hand hive, there were two holes, so to the bucket went on one and the fondant takeaway had its lid removed and was upturned over the other hole. Well can’t see those bees going short, unless it gets very cold. Either way I think I will be re-queening for some nicer bees there this year, they have always been a bit prone to stinging.

I went to the next apiary and the bees there were much nicer there. The first and second hive went without concern, covers off, bees seen, fondant on, close up. On the third hive, my tyrolean hive, I looked in and could not see any activity, although I could see honey stores; then I could hear some buzzing, the I saw them coming up from below. This hive has a commercial deep and a national super, I’d let them put sugar syrup in the super because I didn’t want to take any chances with this one, being the house for my Danish Lady buckfast queen. Anyway I fed them and wrapped them up again.

The next hive was fine and uneventful with one additional task of turning it 90deg to the south. The last however was different case. I’d left a miller feeder on this and a lot of bees had committed suicide in it. I removed that and found quite a small cluster underneath, so I’m not sure that will make it through. That hive needed turning too and I found, much to my annoyance, that the Thornes stand it was on, I’d only bought last year, was already rotting and wobbly. Grr, that will teach me to just make my own in future, or at least buy from elsewhere.

So, I have two more hives to do at the last apiary, and some extra woodwork to get done on top of the one brood box, 3 supers and 50 frames to assemble. Lucky I like that kind of thing.

To prevent drowning bees

So the last couple of years I have had a little problem with feeding bees with a miller feeder. They somehow seem to end up in their dozens finding their way to the main pool of syrup and drowning themselves. This winter I am going to solve the problem. I have fixed a lid to it, with windows to check on them and a hatch to feed through.

Back to the woodshop

So after a year that has been short on honey, at least I’ve got through without loosing my bees like some have, touch wood.

Anyway, last year I used some wire mesh tacked onto hives with nails. It was messy, took too long in-front of the hive and wasn’t ever-so effective I suspect, although I didn’t get mice.

This year I had an idea of a framed wire framework attached to the hive front, full width of the entrance. The first attempt was a ‘bit’ over-engineered, more wood than was necessary, more mesh and a slightly extravagant attachment mechanism including a screw in hook and eye. On balance I might have had enough to make 6 or 7, but I needed to make more in the order of 10.

But all is not lost on that solution, although we will be changing the parameters of the problem at hand. I am thinking I will use it as an anti-robbing cage, closing the mesh up to prevent anything getting through and then opening at one end on the outside and the other end on the inside, making a cage tunnel. But more of that when I get round to it.

So I resolved to have a simpler solution, a piece of 3mm ply wood with a letter box style cut-out. Then attach the mesh with a staple through and tied on with wire along the length. The staple being pushed through to also allow me to just hammer the whole thing onto the front of the hive, for minimal time sat in the danger zone (albeit using a hammer on the hive at the time).

Anyway, 10 made up in record time… A table saw really does make things far simpler and quicker. I popped them in place and the bees happily crawled through them, although I’ve no idea why they were out on a day when it was 8 deg C !

New hive, new apiary

I was invited to have a hive at a new apiary, another large gardened countryside house. I had decided that I should sort out a new hive in order to do this, and someone had just mentioned they had some old WBC hives for sale. I quite fancied the idea of trying out a WBC hive, they do look quite nice after all, the classical image that people have if you say bee hive to them. The one I bought had five lifts (storeys if you like) and was in need of a bit of renovation and modernisation.

I stripped it down, sanding everything and removing the paint from the metal covered roof. The roof was quite rusted in parts and the wooden strip down the middle that covers the gap between the sloping panels of metal was rotted. Still, that was a good excuse to use my table saw to its fullest, including the 45deg tilt I could get on the blade. With a bit of sanding I got great results, looking like an oversized toblerone, to go along the top of the hive.

I’d decided that the obvious colour for the classic hive was white, but I really don’t like dealing with gloss paint, and having to deal with a primer and an undercoat, so I opted for garden wood paint. I also needed to coat the metal roof; so, after stripping it down I painted it with hammerite to give a good protective layer. The hammerite was bright red and as much as it looked nice, it stood out a little to starkly for its intended destination I thought. I sprayed paint over this base, trying out a few light colours to start with but they didn’t quite look right, not contrasting enough to look quite right. I settled on a mid blue, which struck the right note; and interestingly ended up looking quite greek (blue and white being the classic house colour in greece).

Oh and I said modernisation; well that was a case of cutting a hole in the floor and giving it a varroa mesh floor. It wasn’t quite the full floor size due to the entrance slope which I didn’t really want to cut into; still it should put a dent in the varroa hopefully, and give some nice ventilation either way. I used a 14 x 12 deep national as the brood box rather than reusing the pre-exisitng brood box which remains in need of some serious clean up.

Anyway, the end of the story is a successful merge of hives with a lots of brood, a nice south facing site with wind protection from a 5ft hedge and an extra bonus of 20 acres of borage being grown a mile away.